Dynamic Autolayout
Autolayout is here to stay. It’s the best tool we have for dealing with wanting to configure just one interface and present it in different real estates, orientations and size classes. I believe most of us will agree to that simple statement.
Something that not everyone is accustomed to is to also cover different states of the app with Autolayout. Meaning by that that a button -or label, or any other element- may have a leading space of 8px to container under some set of circumstances and 40px under a different ones.
I placed a project on GitHub that I’ll reference throughout this post.
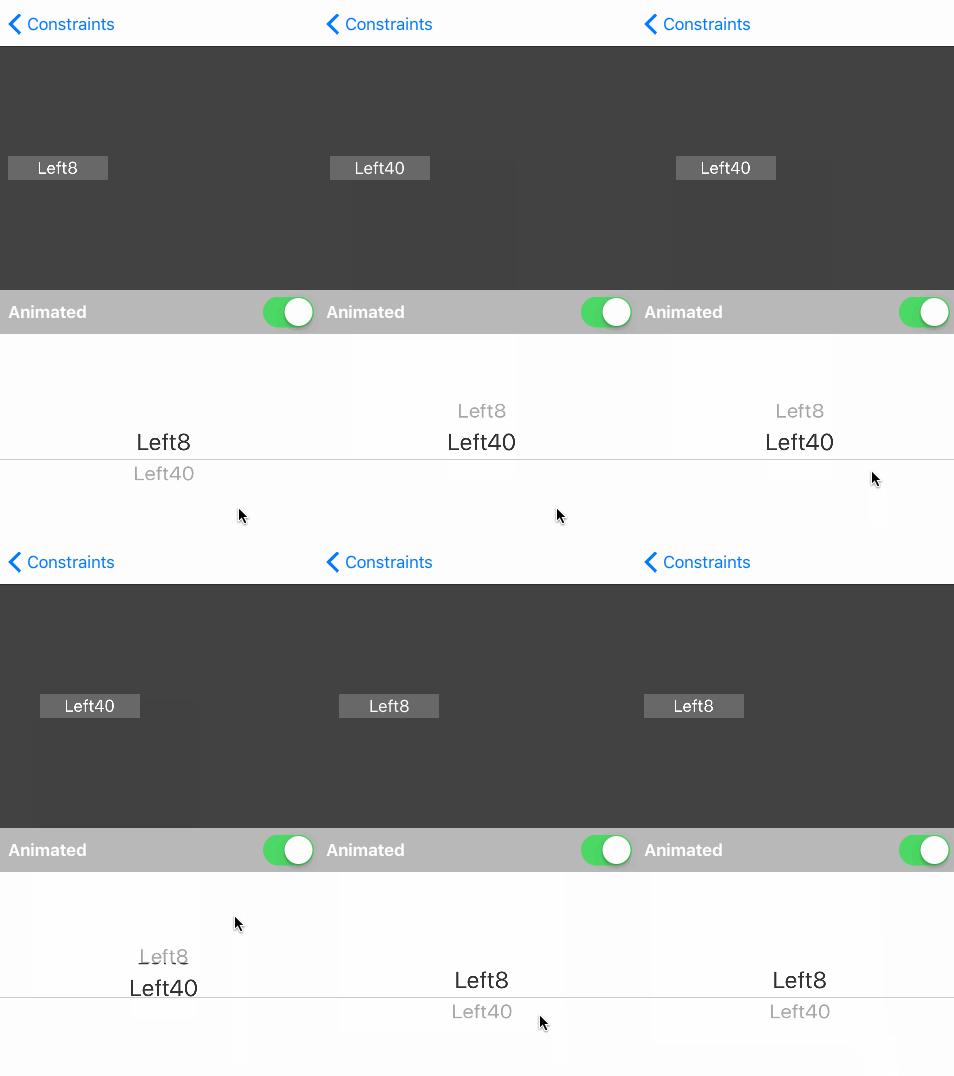
All four screens are basically the same, the main difference between them are on the way constraints are manipulated in the changes closure declared on the configurePosition() function.
Constants
Like almost every other element in Interface Builder, you can create an IBOutlet to a constraint. The easiest and most straight forward way to modify a constraint is by changing its constant value.
Let’s say you want to have a label that has a leading of either 8 or 40 pixels to its containing view depending on the value of a UIPicker.
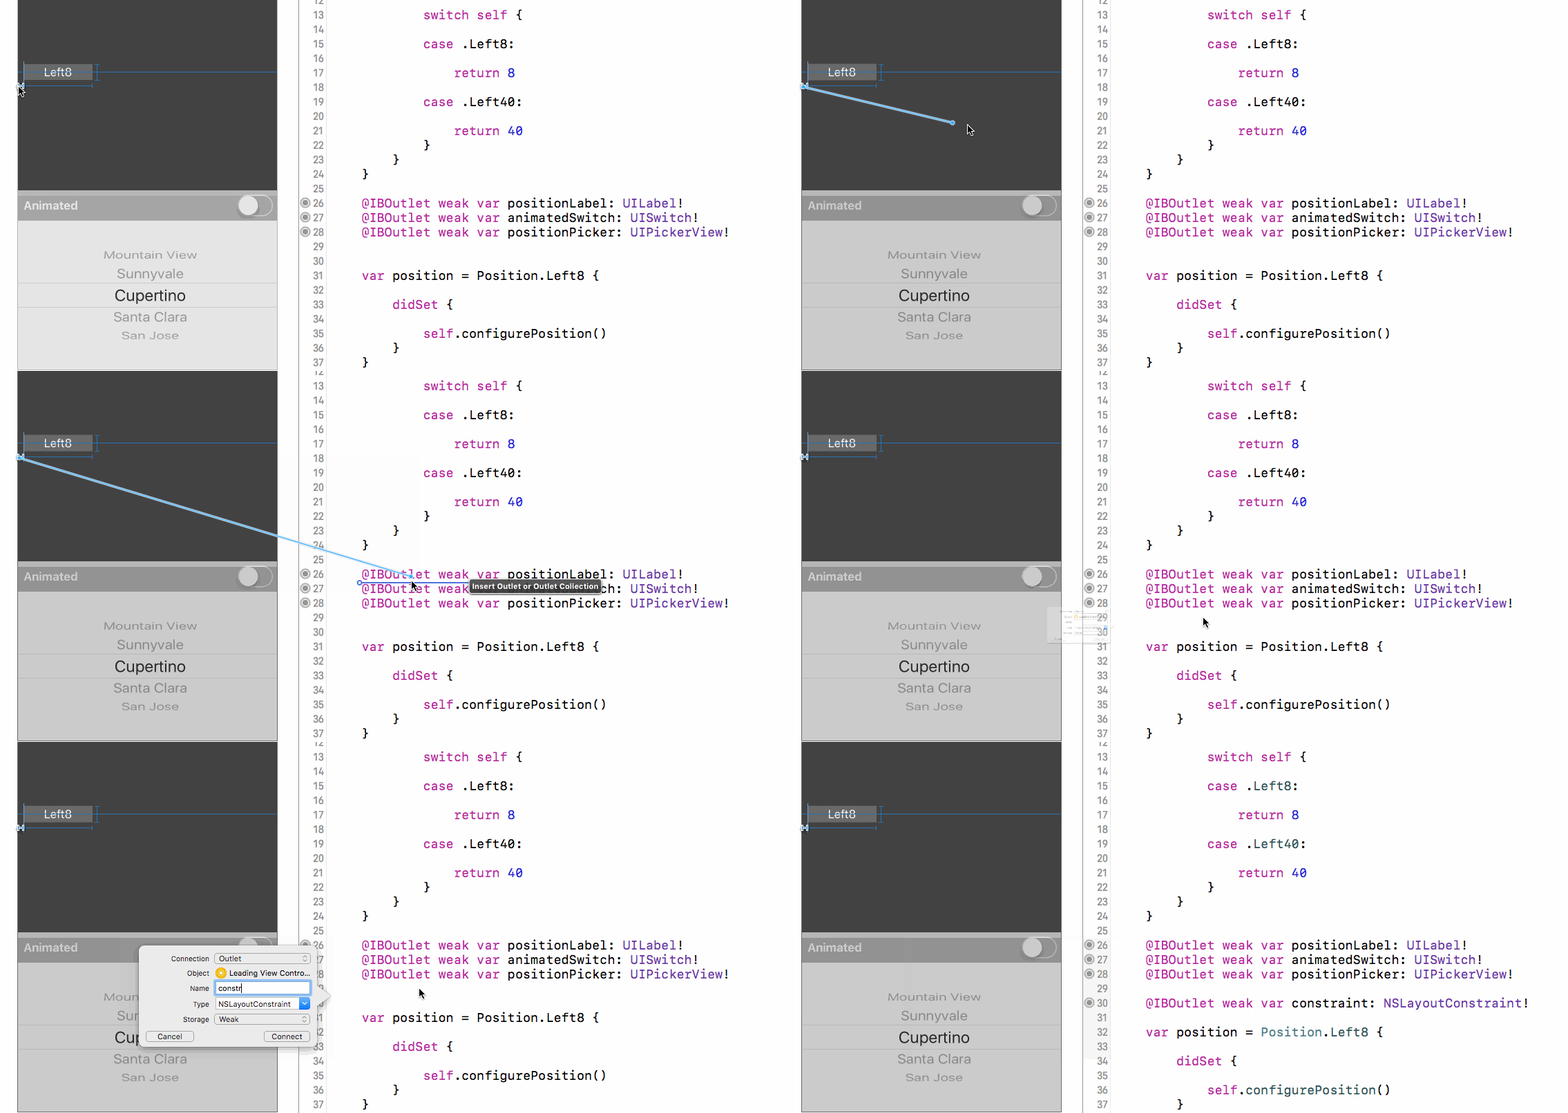
Once you have a label setup with the default autolayout constraints laid down, select the label to display its constraints, control + drag from the leading constraint into your class to create an outlet. You can also do so by expanding the label’s container view’s constraints and locating the leading one in the document outline.

All you need to do now is to change that property’s constant from 8 to 40, and back depending on the value of the position property.
extension LeadingViewController {

  private func configurePosition() {
    ...

    let changes = {

      self.constraint.constant = self.position == .Left ? 8 : 40
      self.view.layoutIfNeeded()
    }
  }
}
A full example of this behaviour can be found on the project’s LeadingViewController.

More Complex Changes
That was pretty straight forward because we are always anchored to the left. Let’s now say that we want the label to be either aligned left or right in the screen, both times with a margin of 8px.
We could still use the same strategy and do some math. Now, the changes closure would look something like this:
let changes = {

  let leftPosition: CGFloat = 8.0
  let rightPosition: CGFloat = self.view.bounds.width - self.positionLabel.bounds.width - 8.0
  self.positionLabelLeadingConstraint.constant = self.position == .Left ? leftPosition : rightPosition

  self.view.layoutIfNeeded()
}
It’s not as clear but it still does the job. A full example of this behaviour can be found on the project’s BorderViewController.

Even More Complex Changes
We now want our label to be left, center or right aligned. Strap yourselves in, this will get messy.
let changes = {

    var leadingConstraint: CGFloat = 0.0

    switch self.position {

    case .Left:

        leadingConstraint = 8.0

    case .Center:

        leadingConstraint = (self.view.bounds.width - self.positionLabel.bounds.width) / 2.0

    case .Right:

        leadingConstraint = self.view.bounds.width - self.positionLabel.bounds.width - 8.0
    }

    self.positionLabelLeadingConstraint.constant = leadingConstraint

    self.view.layoutIfNeeded()
}
Still kinda works and your coworkers or future self will hate you for doing this. A full example of this behaviour can be found on the project’s FullViewController.

A Different Approach
You probably see where this is going. All this math is error prone, hard to maintain and hard to understand. There is a better way.
What we are going to do is add three different constraints, one that will cover each state and bind them to the leftPositionConstraint, centerPositionConstraint and rightPositionConstraint properties.
The left constraint will have a leading horizontal space to container view with a constant of 8px.
The center constraint will center horizontally in container.
The right constraint will have a trailing horizontal space to container view with a constant of 8px.
Of course, these three constraints can’t be satisfied simultaneously… unless we change their priority.
So what we will do is set the left constraint priority (initial state) to UILayoutPriorityDefaultHigh(750) and the center and right constraints priorities to UILayoutPriorityDefaultLow(250).
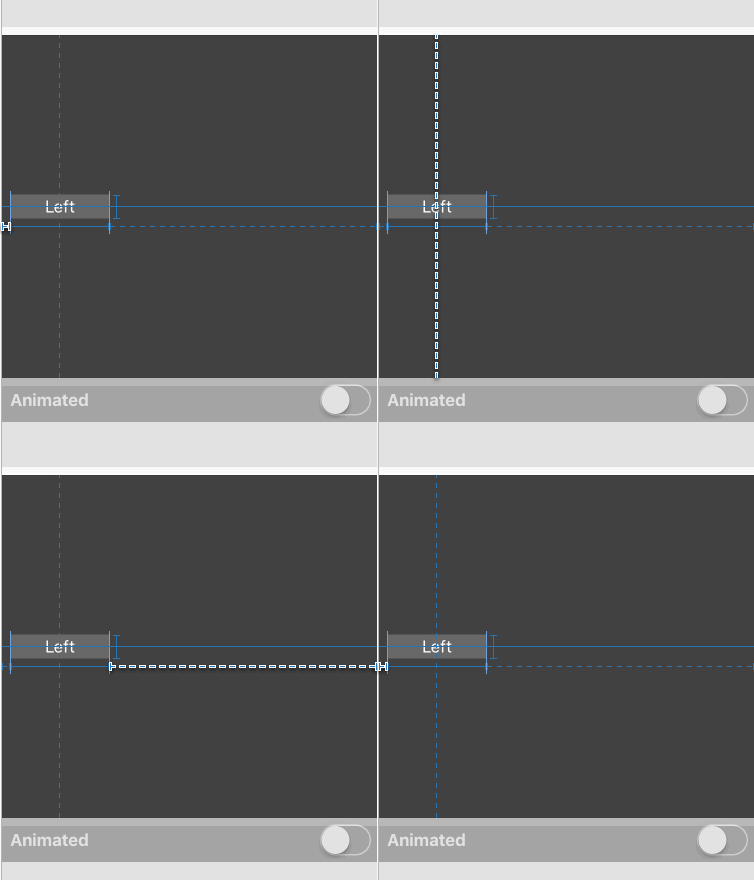
You should end up with something like this (note that non-required constraints are displayed as dashed lines):

To set a constant priority to high or low, simply select the option from the constants priority dropdown in Interface Builder.
The Reward
Now, our code will be less error prone, easier to understand and maintain.
let changes = {

    switch self.position {

    case .Left:

        self.leftPositionConstraint.priority = UILayoutPriorityDefaultHigh
        self.centerPositionConstraint.priority = UILayoutPriorityDefaultLow
        self.rightPositionConstraint.priority = UILayoutPriorityDefaultLow

    case .Center:

        self.leftPositionConstraint.priority = UILayoutPriorityDefaultLow
        self.centerPositionConstraint.priority = UILayoutPriorityDefaultHigh
        self.rightPositionConstraint.priority = UILayoutPriorityDefaultLow

    case .Right:

        self.leftPositionConstraint.priority = UILayoutPriorityDefaultLow
        self.centerPositionConstraint.priority = UILayoutPriorityDefaultLow
        self.rightPositionConstraint.priority = UILayoutPriorityDefaultHigh
    }

    self.view.layoutIfNeeded()
}
Mutability
If you plan on modifying a constraint’s priority on execution, you need to make it mutable. Make sure that none of your dynamic constraints have a priority of UILayoutPriorityRequired(1000). Otherwise you’ll end up with crashes like the following:
*** Terminating app due to uncaught exception 'NSInternalInconsistencyException',
reason: 'Mutating a priority from required to not on an installed constraint (or vice-versa) is not supported.
You passed priority 250 and the existing priority was 1000.'
Activate/Deactivate Constraints
On a final note, NSLayoutConstraint provides us with API to activate(_:) and deactivate(_:) constraints, but this is sadly unavailable from Interface Builder, and thus, prevents us from having a working, warning free interface that holds multiple constraints.
It should be the best approach if you are working with constraints in your code and not in Interface Builder.
Next
Addendum: Dynamic Autolayout + ReactiveCocoa, making this even simpler with FRP and ReactiveCocoa.